Tuesday, 8 November 2016

Vintage A-line

Hello sewing friends, I have recently bought some coloured tights. Which is a tenuous justification for needing a new skirt - or skirts plural - to go with them! Do you ever feel the need to have an excuse for your makes?


Here are a couple of short A-line shaped skirts I liked in the shops, two corduroy, one brushed velvet. I then went through my pattern stash to see if I had any likely candidates.


On these RTW skirts, I liked the fly zip or exposed zip the best. I also knew I had a deep plummy-purple denim (from Ditto fabrics) in the stash which would work well as an A-line. I found a great 1970s A-line pattern that I got in a charity shop eons ago, and thought would be perfect. It has a longer length, but I felt confident it would look just as good. I did actually lop off a good 5 and a half inches from the length of the pattern and it still hits my knee.


I've a considerably larger waist than the pattern's 24 inches. I enlarged it by slashing and spreading. I have no idea if this is the right way to do it, but it seemed an intuitive way to go. It's also worked out well.


All went swimmingly with the construction; amazingly, the fly zip was a doodle. However, I came unstuck at the waistband: my machine just did not want to sew through all those layers, and top-stitching was tedious and slow. I unpicked frequently, as the machine jammed and wobbled.


So, the top-stitching is not my finest sewing hour, but I am going to ignore it - not only can I not face unpicking it yet again, I have also over-trimmed, so I think this is the best it's going to look anyway. It would be churlish to spurn this skirt just because of the waistband, and most of my tops will hide the worst of its sins anyway. In hindsight, I should have used my Nan's 1970s Elna to top-stitch - remember next time, Lou of the Future!


I am very pleased with the skirt; adding those four inches to the waist has worked well, and this deep colour will go with all my new tights! I foresee a mini-skirt version of this in the not too distant future.


Lots of love sewing pals. Next time, I am going to tell you my exciting news about working as a sewing intern for the Sew-in Brighton Sewing school.

Lou xx

Monday, 24 October 2016

A little sewing for the whirla-girla!

Hi there! I am finding more motivation to sew recently. I'm so pleased, as it is good for my mental health and general happiness when I have a project on the go.

These two are little makes, but happy ones.  First up is a summer gingham uniform for the whirla- girla. I left it late to buy school uniform and they only had winter clothes in stock, but it was persistently, gorgeously hot in September. So, I thought I'd make her a summer dress uniform.


All of the other girls wear gingham at school, in many different hues of blue and differing styles; I felt a homemade one wouldn't be out of place.


The only issue with this is the lack of collar. I didn't want to buy a new pattern, as speed was of the essence, before the heat of the sun faded away, so I used a trusted pattern book: Sew Chic Kids.


I love this book, and would recommend it to anyone sewing for young children (2 - 8 years). Mainly aimed at girls, it does have a few shirt patterns, trousers and shorts too.


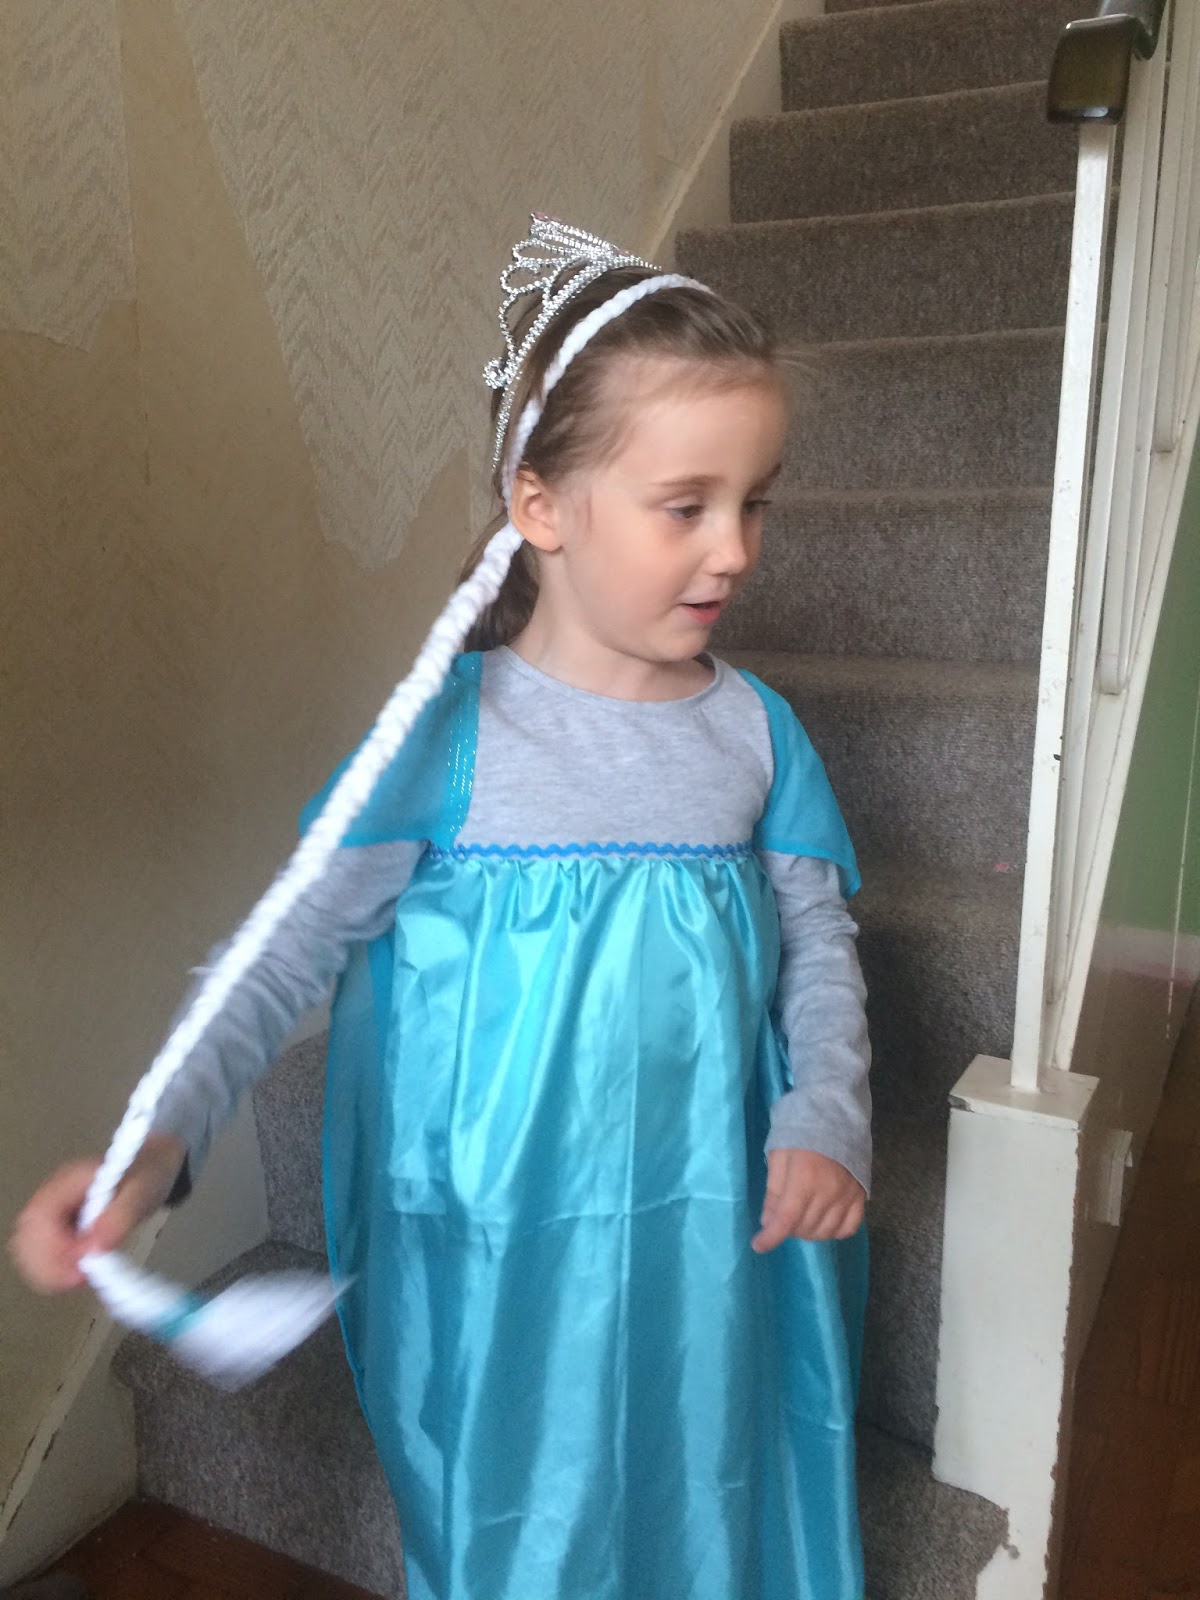
Secondly, I made the darling girl a quickie 'Frozen' costume. I'd picked up some floaty fabrics at the Brighton sewcial fabric swap table. They caught my eye, and practically shouted at me "ELSA CAPE". Sadly for the little one (though not for me) one of the fabrics proved to be silk after a quick burn test, and was deemed too good for dress up! In the end, her costume was made from a slightly too small grey t shirt, an acrylic blue scarf, and some cheapy lining fabric. 


She is happy and that is the main thing. I didn't follow a pattern, just made it up as I went along. It's a gathered rectangle of lining fabric sewn to the t-shirt, which I trimmed to just below the arms in length. I then sewed the scarf to the back neckline to create the cape, and added a bit of ric-rac as trim.


But the crowning glory is the Elsa hair! I had a small amount of acrylic yarn hanging about and I plaited this to create a hairband pony tail. I am tempted to redo this with a full ball of yarn as she loves it and it would look even better thicker. But that's for another day...


How is your sewjo now the nights are drawing in?

Saturday, 15 October 2016

The Keyhole Blouse, sans keyhole!

Sewing is looking up for me at the moment. My sewing room is tidy and inviting, and I am occasionally finding time to squeeze in bits of sewing for myself.


I got the Keyhole Blouse pattern free with Love Sewing magazine and loved the style. It felt very me, and I made it up quickly a couple of months ago with some very old stash fabric, you can see it here. Without a black cami underneath, though, it is a bit indecent due to the keyhole! This time I decided to get rid of the keyhole altogether.


I also added an extra 1.5cm all around to raise the height of the neckline. It now doesn't feel so exposing and is a good height for a statement necklace. Really happy with the result.

I started this make over the holidays, but it was quickly abandoned after forgetting to centre the swans when cutting out! But my lovely IG friends convinced me to carry on, and I am glad I did. It wasn't plain sailing even then: after setting the sleeves, it was straining at the back armscyle.
All fixed thankfully.

I should add that this was probably caused by me, as I did a small shoulder adjustment (the toile top was very big on the shoulders). I was therefore extremely grateful to two Instagram friends, Anne, aka "new_vintage_sewing", and "morrissews", who talked me through how to rescue my top. This basically involved removing the pleats from the back bodice. Now, it fits perfectly.

 Plenty of room now for movement.


The other difficult bit was trying to make bias binding with such fine slippy fabric. But I got around that by blasting my strips of bias with spray starch; they then folded and pressed neatly into shape.  I am glad - the binding is a nice feature of the blouse.


The fabric was bought from Fabricland over the summer holidays and is viscose, which is a fabric I love to wear.  My only concern is whether the feature pleats make me look like I am pregnant?


Even if it does, I shall wear it as I think it's really pretty. If I make another version, though, I think I may stick to style B without the pleats. I have a pretty floral poly crepe bought from TMOS that would make a nice version to wear out for Xmas drinks.

Tuesday, 27 September 2016

The Refashioners Challenge and The Stylish Dress book

Hi there.  After my last post about my flagging sewjo, I've made an effort to prioritise sewing.  Even if I could only sew every other day for 15 minutes at a time, I felt that was better than not at all.


As I have been making lots of silly mistakes over the Summer, I wanted a project that was easy skill-wise and very little financial risk. Enter Portia Lawrie's Refashioners challenge to create a new garment from jeans. I watched her series with interest, and thought the garments created were outstanding; but, I did feel  a lot of them were rather wasteful in the number of jeans used to create one garment - in some cases nine pairs were used!  Lots of fabric must have ended up in the bin, which I felt rather went against the spirit of refashioning.


I wanted to limit myself to using only one pair of jeans, and I was lucky enough to find a huge pair (size 42 waist) for just three pounds. I felt if I mucked it up, I'd only be wasting three quid and only one pair would end up in fabric recycle. So, worth a go.


As I didn't have the energy to spend hours on a new-to-me pattern or work out free-hand pattern making, I spent some time looking through patterns I have used before, and that were ready to go without alterations. I plumped for Dress D from The Stylish Dress Book. I have made it three times before; it's straightforward to make and I know the shape flatters me.


I unpicked rather than cut the seams, so I was lucky to be able to fit the pattern pieces on the legs. Unpicking also created these funky looking features at the side seams where fabric that was originally within the flat felled seams is now on show! I rather like the effect.


The other features I really like are the dark patches which were originally hidden beneath a pocket. I think having the different tones of blue looks fun.


In an attempt to use as much of the original jeans as possible I re-topstitched one of the pockets and also wanted to use the waistband as the hem - much to my delight it fitted perfectly, I added the little leather tab too, but I'm not sure if that isn't too much?


I am really pleased with this dress; it was a slow process, as I found it hard to motivate myself. I am so glad I did, though, as it feels wonderful to have made something I enjoy wearing. Did you take part in the challenge?  I'd love to see your makes.

Sunday, 4 September 2016

Finding my sewing self again

Hello sewing friends. I hope you've had a good summer. We have had one of the best summers for many a year; the kids are at that age where they can be a real joy, and need less constant supervision.

We've had a wedding to attend, met with many old friends, swam in the sea almost daily, been on a camping trip, holidayed in a castle, and generally had a fabulous time.  But in all the excitement I lost my sew!

I did make a few things:


This dress was run up quickly as a birthday present. It went down well, but I did not feel the love - it was more of a chore.

I have also made shorts for my little girl, which I love, but they remain unfinished despite only having the elastic to go. There are other UFOs too: a top, a blouse and a dress! It's so unlike me, and I don't like this lacklustre feeling. With each project there has been a mistake, or a few, as I'm too tired to sew properly, and a lack of inspiration has seen all these languish un-sewn.

Luckily, I have lovely Instagram friends who have given me advice and support. I feel so buoyed by others' confidence. I am inspired to try the re-fashioners challenge with a £3 pair of jeans, so if it goes wrong like those other projects I haven't lost much. Will report back...

Tuesday, 2 August 2016

Pilvi Jacket from Everyday Style: Lotta Jansdotter

It's the Summer Holidays - hurrah and huzzah!  No more school run for a bit; lazy days beckon in the sunshine, and I'm rather looking forward to it. But somehow along the way I seem to have lost my sewjo! I had some very necessary but rather boring sewing to do (alterations on two of the three bridesmaids' dresses below). I was frightened so much of messing them up, I took a lot of time over it, while all I wanted was to sew things for me! Very selfish, I know!

Bodices taken in, hems taken up, and the wedding now over, it was time to crack on again; but,  momentum has been lost. I have tidied my sewing room to make it more appealing, but it hasn't reignited my sewing passion just yet.


However, I do have something a few weeks old to show: the Pilvi Jacket from Lotta Jansdotta's book Everyday Style. I bought the book as a treat for myself when having particularly horrid hospital procedures earlier in the year. It is a great book, full of style and lifestyle pictures as well as great patterns to make up.  I have several of these patterns on my to-make list, and thought I'd start with The Pilvi.


I have made this as a wearable toile, using a loosely woven grey sparkly woolen-mix fabric. I bought it years ago, I think from Worthing's Wednesday Market. It certainly wasn't very expensive and isn't great quality - it definitely has a poly-content. I thought it was pretty enough that I'd wear it, but no great loss if it went wrong.


It's a simple raglan style jacket, unlined and with facings built into the pattern pieces. It was an easy and relatively quick sew. Or it would have been, but I didn't like my original black topstitching, so spent hours unpicking it before re-sewing with a complimentary sparkly thread. The silver topstitching looks much better.


Overall, I like the style of the cropped jacket, though it is slightly to big at the front. If I were to make it again I'd have to work out a way to make it smaller (it's already the smallest size in the book). Perhaps a brightly coloured version would look good?

I was all ready to pop out wearing it, when my photographer, otherwise known as my dearest darling husband, mentioned that it has something of Theresa May (UK prime minister) about it and I promptly took it off! I'm sure I will wear it, though it may be a while before I forget his words!!


I am looking forward to making the "Esme" shift dress in due course, when I  finally feel fired up for sewing again. Thanks for reading folks, Louise xxx

Sunday, 3 July 2016

Child's Simplicity pattern 1146 x 2

Hello stitchers,  This post is just a quickie.  A few weeks ago I was on a "reduce, reuse and recycle" mission. I had an old maternity dress that I had bought second hand, which had seen me through three pregnancies, and had definitely seen better days.


However, there was some usable fabric in the skirt section.  Enter: child's Simplicity pattern 1146. An easy (only two pattern pieces) knit dress, this one cut out in an age 4 with age 5 length.  As I made this a while ago it has been in and out the wash, and has been worn lots; no ironing as it's a knit. Happily, Little Miss loves wearing dresses, they are her favourite.


This version closes with ribbon ties; a second version I made at the same time has sweet little buttons.


This second dress uses up two tiny remnants from t-shirt making.  I haphazardly sewed them together before cutting out the pattern pieces. I did this to avoid spending too long faffing around over an everyday nursery kind of dress. One tiny bit of lace trim from my goody box (this had almost certainly been cut off another garment as it had treads over it) really lifts this little dress.


So, two almost free dresses. I did pay £2.04 for the pattern in a half price sale. The rest of the maternity dress, though beyond use in clothing, has been cut up for my rag rug course! Call me Mrs. Thrifty! See you soon stitchers.