Hello. It's cold and foggy here, so I have been staying in and reading lots of Australian sewing blogs, warming myself up looking at all their sunny pictures! But today I braved the cold, and went out to do a felting workshop at Hove Museum. When I arrived, all the materials were out on display and looking better than sweets in a sweet shop!
So many nice goodies. Nadya, our teacher, demoed a basic technique whilst we had coffee and croissants! Bliss. There seem to be two main ways to felt: needle felting with a hooked needle with which to interlock the fibres, or smooching them together with soap and water. The latter seemed more fun and hands on, so I went for that.
 |
| Demonstrating rolling felt beads |
 |
| A fellow student needle felting |
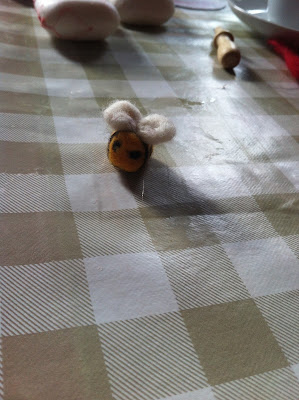
Some of my fellow crafters made felt beads, one made a felt bowl, another a flower, and one a really cute little bee!
 |
| Needle felted bee, made by another student |
First step is to choose your wool and colours. I tried to keep my colour palette simple, so I could embellish with glitter and small beads (which you can trap in the felt between the fibres).
 |
| Light and fluffy before felting |
We worked on a rattan table mat, and trapped our wool between some netting to create a felting sandwich. After rubbing the soapy wool for five minutes, we washed the soap out and dried our pieces on the radiators.
 |
| My work drying on the radiators! |
A versatile craft and one I really enjoyed. But will I be rushing out to buy felting wool? Probably not. It's not an expensive craft; Nadya explained you could buy a mixed bag of wool for £10, and we found that a little went a long way. So possibly in the future it would be fun to dabble and make a no-seam bag or hat. But for now I have to get my thinking cap on and decide how I am going to use my finished pieces!
 |
| Pinks and purples |
 |
| Felted sausage |
 |
| Reminiscent of grass or meadows, actually looks much nicer in real life! |
I'm thinking of making a couple of brooches and a bracelet, but any other ideas would be welcomed.


